that is correct... a pottery barn 'inspired' console table has made its way into our lives.
and we were inspired!
we have been planning on some building projects, and agreed that we should tackle something a bit smaller than what we were going for.
so we decided to start with this!
we grabbed the notebooks and the tape measure and started to make a plan. that looked a little something like this:
and after a trip to lowes, our back patio and yard looked like this:
things that we HAD to have to make this table:
patience (number one, hands down)
lots of screws
lots of wood
circular saw
drill
square
tape measure
wood glue
sander (we have a palm and a belt sander, and we used them both.)
first we cut our wood that would be used for the table top and positioned those to get a good dimension of the width of the table. then we put that to the side.
we started with cutting the legs and then really just went from there. we used two 2x4's for each table leg, glued them and screwed them together.
and trust me... ALWAYS countersink your screw holes. if you don't, chances are your wood will split. or you will have big screws sticking out all over your POTTERY BARN inspired table... not cool.
then we built the frame -
if we didn't have a square... this would have never been properly lined. who knew... a 5 dollar tool would save the life of your building project!
then start drilling your top boards in place.
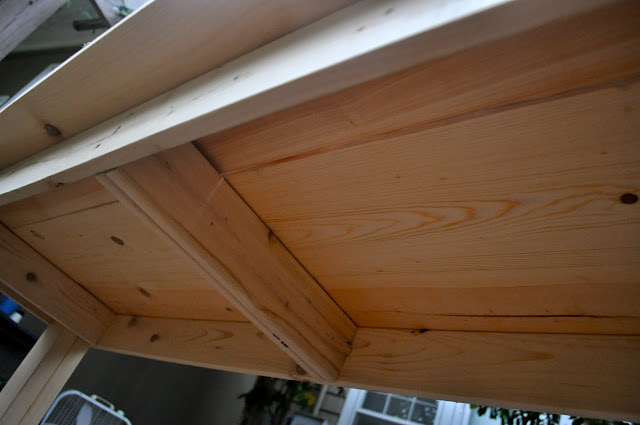
and there you have your frame. we added some extra support on the inside of the top because we wanted overhang on each side and the ends.
so we added inner boards to the inside of the legs like this -
then take your boards for the table top you previously laid out, and assemble them on the top. countersink your holes and drill it in place!
here is a photo view of the center support beam we added to the top frame.
and here is our table - all put together and ready to be attacked with wood filler and medium grit sandpaper!!!! i can't believe we actually built this!
for those of you who love projects and have a few tools that are begging for a job... check out ana-white.com. this is a chick with power tools, and she builds ahhhhh-mazing furniture. she writes all her plans out in simple form, telling you what wood to buy and how to cut it.
and honestly, if we can do this for a first building project, anyone can do it... including YOU!
as for our ultimate building plan -
we bought a kitchen table when we first got our house in west virginia. its an adorable little table with two glass insets in the top. never, never, never again will i have a kitchen table with any glass on it. never again will i buy any type of table with glass on it. it is a collector of any particle imaginable. we just can't keep it clean. impossible. so for months we have been talking about wanting a new table. we have parsons chairs so really only need the table itself. and we are not buying until we find what we really want... so what do we really want - restoration hardware's reclaimed farm table. and how much does that one set ya back... 2200.00. yes folks, that is two thousand two hundred dollars. ugh.
so that is where ana-white.com comes in handy. this girl seriously drew up the plan for the EXACT table, built it, and sent her inspiration to blogland.
and that is our ultimate building project.
i. can't. freaking. wait.
~
hope this has inspired someone out there in blogland.
part two of the table process to follow...
happy building!


2 comments:
Hi Jessica!
I am hopping on over from "Girls with Good Taste" & LOVED your redo!!! Love your blog! I was trying to find your follower gadget on your page, but couldn't find it?!?! In the meanwhile, I will add you to my blog roll list so I can see your updates. :) Take care and thanks for the tutorials! :)
Best,
Jessie
thanks so much for the sweet comment! i updated my follow gadget so hopefully it will work now.
Post a Comment