Thursday, October 20, 2011

DIY photo ledge via Ana White

ana-white.com 
ana-white.com
ana-white.com

i hope everyone in blogland has checked out this amazing gal and all her skilllllz.... seriously, she is amazing and can build everything imaginable. the hubby and i have been scoping out her website every single day, looking for weekend projects. after building our pottery barn inspired table, i decided that i wanted a photo wall above it. hanging a billion photos is so aggravating to me so a photo ledge was a brilliant project to take on.
enter ana white's 10 dollar ledges.
HERE is where you can find the plan.
so off to lowes to went to get our supplies!
fortunately, i have an awesome husband that owns this....
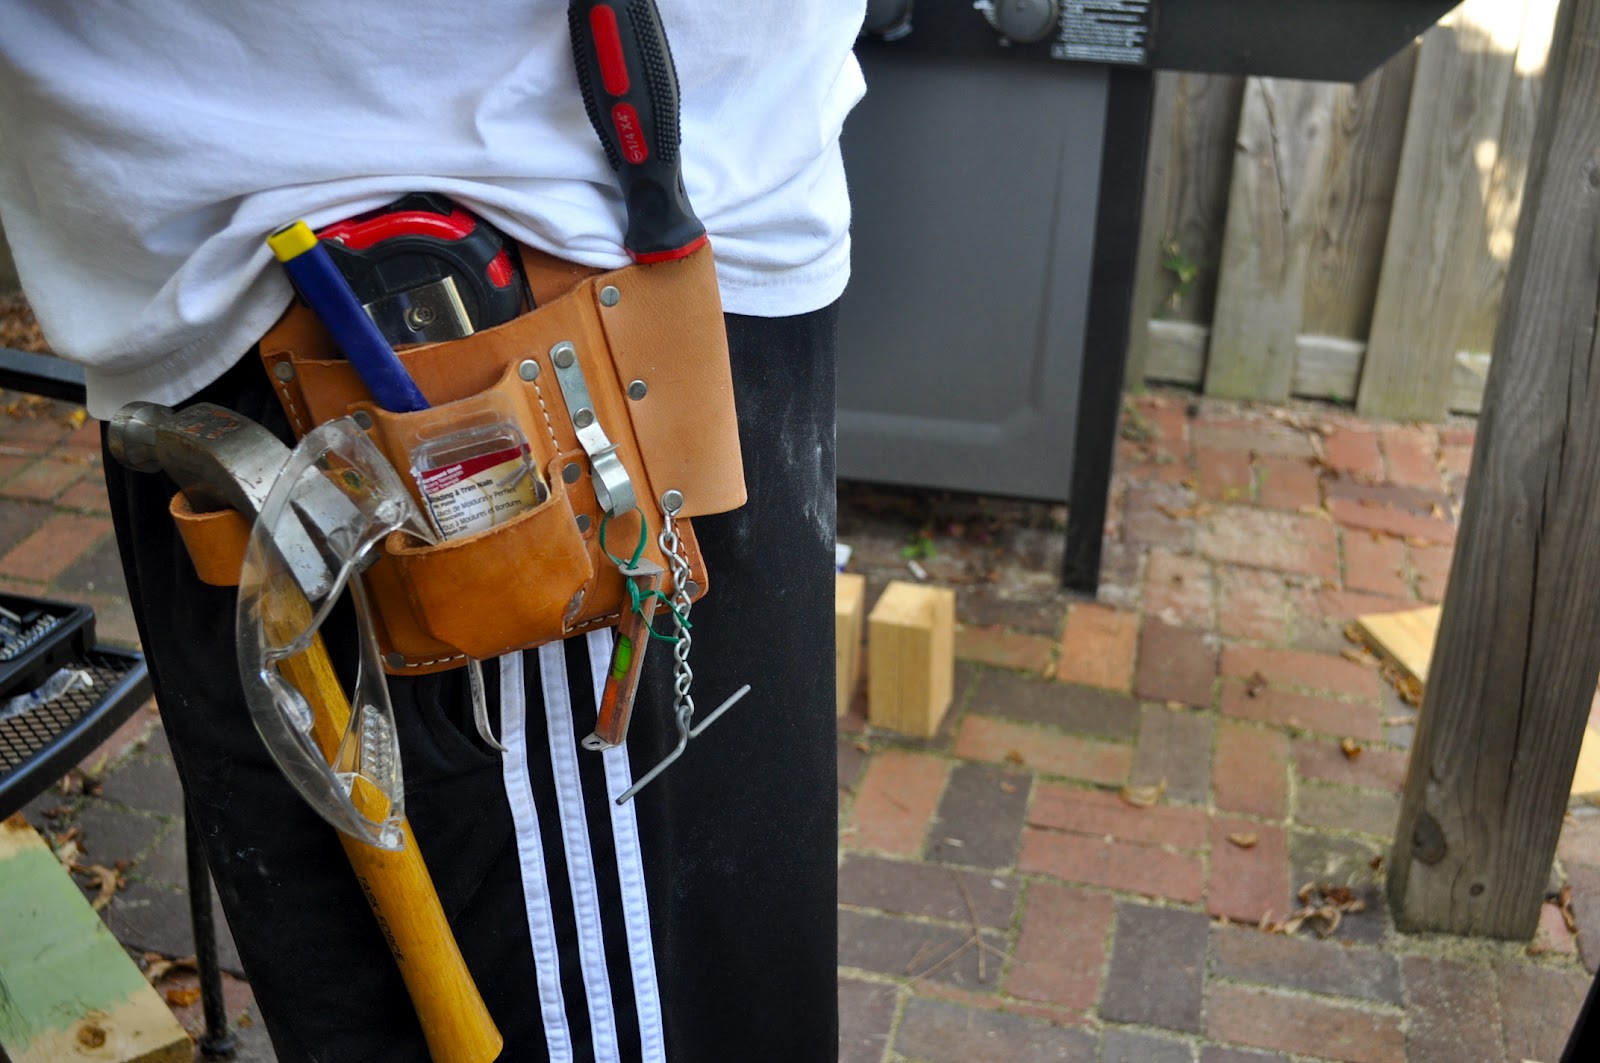
i mean seriously, have you ever seen anything so adorable?!?!?! god, i love that man so much! and it is SUCH a plus that he is handy and can use power tools like nobody's business!!!
anyhow... regardless what kind of situation you are in - whether you own a circular saw or not, you CAN do this project. lowes and home depot will cut your wood for you, and for this project, you may or may not need any cuts period.
your supplies for this project are 2 1x4's and 1 1x2 boards. those boards will make you an eight foot photo ledge. in my case, i needed a four foot, so i only purchased 1 1x4 and 1 1x2. we cut all three boards in half and tossed the leftover 1x2.
all you do is glue your 1x4's together and screw them in... PREDRILL or it WILL split! then tack on your 1x2 strip to the front with finishing nails.
and there you have it. a photo ledge.
we painted ours white and it was ready to hang! simple and PERFECT!
sanding all the boards
nice and smooth and ready to assemble
we added wood glue to join the boards then used wood clamps to hold them together. 
we tacked on the front 1x2 strip with finishing nails.
painted white
and looking amazing on the wall! 
hopes this inspires someone out there to pick up a piece of wood and build something with it! i promise you... it is the MOST rewarding feeling :)
Monday, October 17, 2011

DIY Pallet Crate

as promised, here is the tutorial for the ancient pallet turned crate.
enjoy =)

a pallet has been sitting in my yard for about six weeks now... a verrrrrrry old wooden pallet that we found on the side of the road. finally this weekend, we ventured outside to dismantle this hunk of beautiful wood to make a crate for our vinyls. little did we know the headache it takes to dismantle one of these things... geez. but we won. we dismantled every last piece of wood this pallet had to offer!
it started like this - sitting on our work table. we quickly found out that we would be turning this thing upside down and sideways about a bazillion times. lots and lots and lots of hammering. i mean... looooooooooooooooooots.
but in the end, look at all that beautiful aged wood. i really can't imagine how old this pallet was. the nails that were used to hammer it together were completely rusted and also twisted, so getting that completed was a true pain. there were also a million staples, and not just regular ole staples, staples that were about 4 inches long. yeah, a beast. but we had our minds set to make a vintage looking crate from reclaimed wood to house our vinyls... and that is just what we did.

*you will definitely want something to hold all those bazillion nails and staples... otherwise, a  tetanus shot will be number one on your to-do list...
(see those twisty rusty nails... now you can see what i was talking about... b.e.a.s.t.
we made our sides first, then measured the width by adding a record. when we got our correct measurements, we screwed side strips to hold everything together. then added a simple wood bottom.
and voila. yet another building score! and look how great it looks holding the vinyls...
i love how the color of the wood is different on each plank. i promise, i didn't plan for that to happen! it just did.
the joy of building.

Friday, October 14, 2011

I WAS FEATURED!!!!!!

yes, it is true.
my DIY pottery barn inspiration table was featured on a fabulous blog that i follow and dearly love!
this gal gives me daily inspiration, and also led me to build a table nearly identical to her own.

check it out -

http://meandjilly.blogspot.com/2011/10/remarkable-reader-re-do.html

(i'm pretty pumped about this!)

thank you so much to girls with good taste! your blog name speaks volume.

Monday, October 10, 2011

{pottery barn inspiration table reveal + amazing treasures}

so the big reveal is FINALLY here!!!

HERE is the link to part one of our building process for the pottery barn inspiration table.
and HERE is the link to part two.

and now, here is the inspiration photo that began all this beautiful building madness - 
i had been drooling over all the pottery barn work benches and console tables for quite some time now... this table could not have been more perfect and i knew that the second i saw it! 
the way this crafty gal decorated her table was EXACTLY the way i wanted mine to look... the vintage suitcases, the rustic metal... my kinda style! (thank you, thank you!)

so without further ado... here she is!!!!!!!!!!!!! all decked out with fabulous vintage decor!
here is a close up view of the top-
and a close up view of the bottom shelf (that took FOREVER to build).
 and we even added casters to the bottom!
we are so in love and i still can't believe we built it!!! 
for the stain, we ended up mixing two different oil based colors together to get what we were going for. i let everything dry and sit overnight, then applied minwax finishing paste to the whole table. 
to make this post complete, i must add all the other beautiful features in the photo. 
the photo ledge above the table we also built. it is an Ana White plan and was SO unbelievably simple to build. 
the crate sitting on the floor beside the table we built using an olllllllllllllld wooden pallet we found on the side of the road. 
(the ledge and crate will both have posts of their own explaining exactly how we made each.)

and all that beautiful decor was vintage items that we found buried in david's grandparents garage...
like this tiny leather suitcase that is lined with silk fabric. and LOTS of blue mason jars.... 
OH. MY. GAWWWWWWWWWD!!!!!!!!! 
i really couldn't believe my eyes. really. 
i can't even begin to tell you how happy this made me.
three lovely blue bell's are displayed on one side of the table. all three different sizes... all beautiful!
 another larger suitcase that fit the bottom shelf perfectly.
 an amaaaaaazing old rusty metal railroad lantern
an old west virginia license plate, with the year that david was born. 
and this old metal sprinkler hose that still turns like a champ! 

we really couldn't be more pleased with how this turned out.
sometimes the building got tough, and there may or may not have been a few yells let out... but every second was worth it. we really did have a blast through the whole process.

here are a few more treasures that we collected from davids grandparents -
tools for davids collection like a router, another circular saw, and a ton of clamps.
two beautiful quilts that i will forever cherish-
a beautiful brooch -
about 100 different vintage sewing patterns -
and loads of thread on wooden spindles -


all treasures.
Sunday, October 9, 2011

{DIY jewelry display}

i own a billion necklaces, all of which i have a deep love for.
getting rid of any of them is just a plain ole' NO.
i have two jewelry stands, but the long necklaces are just too long and end up wadding up on the dresser. so with a scrap piece of lovely painted wood, i decided to make a display shelf for those long necklaces to hang on!
here is how i did it. (simple)
remember THIS post about painting and distressing scrap wood and making mason jar sconces? i used that extra piece of wood to make a treasure...
attach a pipe clamp to one side and slip a mason jar in.
make pencil marks on the wood where you want your hooks to hold the jewelry and screw those in.
add sawtooth hooks on the back for easy hanging.
add some cute flowers to the jar.
hang on the wall and display your necklaces!
simple and adorable.
Tuesday, October 4, 2011

DIY fall wreath

i love displaying wreaths on my red front door. i always have one hanging and since spring, this one that i made has been on display. fall is now present (finally) so it was time for a switch-up. in the bizillion hours a day that i spend on pinterest, i found tons of inspirations for beautiful yarn wrapped wreaths. the wheels of my brain haven't stopped turning since finding these, so i decided when fall arrived, i would make my very own. today, i did just that.

i made a quick visit to my local hobby lobby (with my 40% coupon in hand) and purchased a straw wreath (3.99), a skein of burlap brown yarn (2 something after coupon), and made my way home to get wrapping.
to begin, i wrapped the yarn around the wreath and tied a knot to secure. then i started wrapping. my advise to make this part go a little smoother: unwind your skein and re-wind it into a ball. just makes things a bit easier. i left the plastic on my wreath to keep the straw intact.


when i finished wrapping, i tied the end of my string to an existing piece i had wrapped, and added a little hot glue just to make sure it wouldn't come loose.
now onto the focal point of this lovely fall inspired wreath -
i could have used burlap but it doesn't ruffle as well as regular fabric, so i chose a burlap colored linen fabric. i cut three different widths and used my sewing machine to make a long stitch down the center. leave some of your thread hanging on both ends!
to make your ruffle, take the hanging thread on one side and separate them. the bottom is the thread from the bobbin, and when you pull, it will create a ruffle in your fabric. voila!
i made small slits in the pieces of fabric on each side to the length that i liked, then ripped my fabric. i could have just cut it, but ripping it so much more fun. and easy. (plus you get that extra loveliness from the frayed edge where you tore!)
next, i wrapped my piece of ruffled fabric around the wreath and glued in place. i also did a quick hand stitch to make sure it wouldn't come apart.
and there you have it. a ruffled yarn wreath!
to make it even more fall'ish, i made a yo-yo out of the same fabric and added a few beads, then added that in the center.
and there you have it. a fall wreath for less then ten bucks. i am LOVING the contrast on the red door!

***for those of you interested in the outcome of the pottery barn inspired console table... it's comin' up soon!!!! and it turned out even more amazing than we had hoped for =)


Blog Template by BloggerCandy.com