Showing posts with label Tutorials. Show all posts
Friday, April 27, 2012

a very special skirt {tutorial}

if you know how to turn a sewing machine on, thread the bobbin, and sew a straight line - then you can make an elastic waistband skirt in literally minutes. there is really nothing to it! search pinterest for an elastic waist skirt and your options will be endless!
with that said, i have been making these skirts and LOVING them! last winter i found a skirt a jcrew that i REALLLLLLLY wanted, but didn't want to spend the money on. i found a wool fabric that was very similar and made my own! saved myself 60 bucks!

last year when david's grandmother passed, everyone went through her home to take things that were special to them. mrs. betty was a crafter! she had OOODLES of fabric stashes and my precious husband brought those home to me! i was beyond excited to sew something with fabric that she had once used. in one of the stashes was a very pale pink fabric with tiny white roses on it. it had been ripped up and cut on, but there was about a 1/2 yard left in one piece.

here is the fabric -
so pink and girly!
i decided to make the first skirt for ellie because we went to raleigh last weekend, and i could try it on her to make sure it fit properly.
i put together a picture tutorial so you can make your own! i promise, it is so simple. i made this one in 25 minutes tops.

take the waist measurement of whoever the skirt will be for. in this case, the waist measurement was 19. i doubled that measurement and cut a 38 inch wide piece of fabric. a standard 3-4 toddler skirt is 8-9 inches in length, and i added an inch for the hem. so my starting fabric measured 38 x 10. with right sides facing together sew the open ends together creating a tube and press your seams flat with your iron.
so now you have a tube of fabric. next you will do the hem on the bottom of the skirt. fold down and press 1/4 inch all the way around the bottom of the fabric. then fold over 1/2 inch and press, pin, and sew. the double folds will prevent the skirt's hem from fraying.
all that is left is to add your elastic. take your first waist measurement (mine was 19) and cut your elastic to that width.
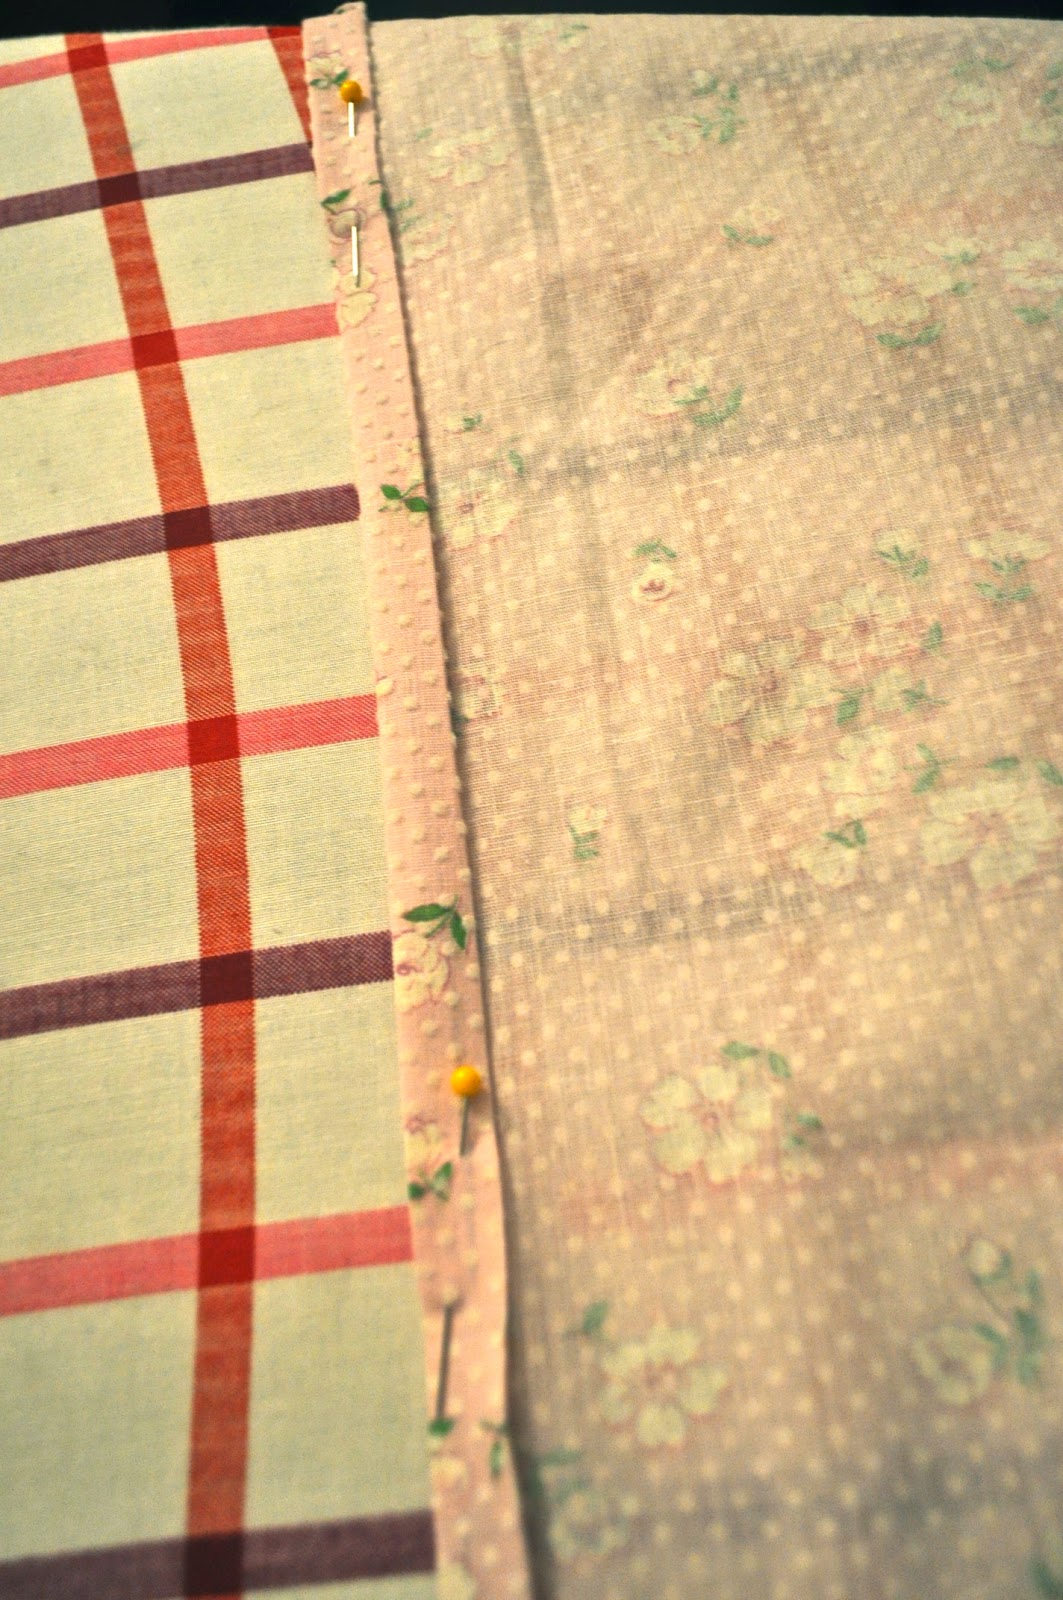
on the top of your skirt where the elastic will go, press 1/4 inch again then 1 inch if you are using 3/4 inch elastic (use your elastic as a measurement). if you want a wider elastic like 1 inch, then just make your fold .25 inches larger. pin and sew near the edge of your hem, leaving a 3 inch opening near the seam. this opening is where you will put your elastic through.
this is how your skirt should look -
take your elastic and attach a large safety pin to one end. insert that safety pin through the opening you created in the hem and push it through until it comes out the other side.
sew the two ends of the elastic together with a zig zag stitch. i do this back and forth about 6 times to ensure it will not come apart.
once that is sewn, let the elastic go into the skirt and pull your waistband to separate all the gathers. sew the hem where the opening was, and you are finished!!!!
i was completely happy with this and it has so much meaning! ellie now has a skirt made with her great grandmothers fabric. fabric that she actually used to make something with herself. it's special and it's adorable. i can't wait to make more for all the girls!
i was so excited to put this adorable skirt on ellie and when i did, it was the perfect fit! here are some modeling photos of the beautiful ellie showing off her new skirt!

Friday, January 27, 2012

DIY chalkboard time

everyone has the chalkboard craze on pinterest, including myself. 
there are 85 billion pins on how to make your own chalkboard, and how to turn frames into a chalkboard, add labels to your jars with chalk paint - it's endless. and it's genius. 
so finally i put use to a picture that was purchased when we first moved in together in huntington, wv. this picture has been sitting in a closet wrapped in paper since we moved to south carolina. 
i unwrapped the brown packing paper and cleaned the glass. i used painters tape to wrap the entire frame and then went outdoors to spray the glass with chalkboard spray paint!
 i did as the can said - multiple small thin coats.
i believe i ended up doing three coats and after all is said and done, i wish i would have done a few more. 
after spraying i took the frame on the porch to dry overnight.
 i also laughed at my silly hubby sporting his superman shirt.
isn't he just adorable :) 
back to the chalkboard!
the next day i took my new chalkboard inside and 'primed' it up. i read multiple blogs stating to do this... you use the side of the chalk to rub all over the frame and this acts as a primer. leave it on for a few then wipe it off.
after wiping all that dusty chalk off, we tested it out and it was exactly like a real chalkboard! all from a cheap can of spray paint that i purchased at hobby lobby!
this was my first go at it -
and this was david's
and what we settled on ~
i love my new chalkboard. it was fun and super easy to make! 
so go make one!


Monday, January 16, 2012

DIY wood stain for a DIY wall shelf

while shopping around savannah, georgia, a super fantastic town, i picked up three ADORABLE elephant wall hooks. i have been wanting THIS shelf from anthropologie - but the price tag was too much for me to pay when i have the means to make nearly the exact same thing myself.

the idea of making my own stain was also very appealing to me... so i did just that with a few simple and cheap ingredients - vinegar and steel wool.

i took a glass mason jar and put one piece of steel wool in the bottom, then poured vinegar over it until it was covered. i sealed the jar up and let it sit for 2 days.
we had a scrap piece of lumber and cut it to the size we needed. here is what untreated lumber looks like... brand spankin' new wood. not pretty.
we laid the board out on our workbench and with a sponge paintbrush we applied a coat of the steel wool/vinegar stain. it went on clear. i read that it needs drying time to allow the stain to soak, and as it dries the wood darkens. welllllll... IT DID JUST THAT!  before it was completely dry i added a second coat of stain.
after 24 hours, here is what our brand new piece of lumber looked like...
i couldn't believe my eyes. it was the aaaaaagggggeeeeed barnwood look that i dream about decorating my entire household with. and the more coats you apply, the darker the wood becomes. perfect.
we finished the wood with minwax finishing paste (use that stuff on everything!)and then pre-drilled holes for our elephant hooks and screwed them in.
and there you have it... a wall shelf that cost less than a fraction of the anthro shelf, and its made with your own hands... much more special! we have our new shelf hanging next to the door that keeps our coats and the pups leashes. it is super convenient, super adorable, and i absolutely adore it!!!

Monday, November 21, 2011

{DIY refinished dresser and a salvaged window turned mirror}

long ago, i thrifted this old and beat up antique dresser -
it was dirt cheap and i fell instantly in love. 
i sanded it down to the original wood and painted it a grayish-blue color. 
i added glass knobs and called it a day.
this pretty little dresser has been the focal point of our guest bedroom for nearly two years now, but recently i just wasn't feeling the look.  i felt it needed something more than just a painted finish. 
i want every single piece of furniture this girl finishes. 
really, she is amazing. 

so again, i was determined to refinish this refinished antique. 
i detached the mirror and decided not to use it again.  
i sanded all the polyurethane off, then hit it with the sander all over the edges and in all the nooks to expose the original wood. i also roughed up some random spots along the top and on the drawers. 
here is what the edging and one of the drawers looked like after sanding -
and for the magic - 
i used dark walnut stain (my go to color) and literally wiped it on, then wiped it off. all of those sanded areas were darkened, and the grayish blue painted areas were given a glazed aged look. 
(exactly what i was going for!!!)
i was instantly satisfied and ABSOLUTELY knew that this dresser would never be touched again! 
here is what the drawer looked like after the stain -
i coated my new dresser with minwax paste to give her a nice smooth finish.
this stuff rocks. i use it on every piece i refinish!

now that part was complete and i just needed to find myself a mirror.
i have had a project up my sleeve for quite sometime now about making my own mirror from an old window and this crazy genius invention of looking glass spray paint.
well low and behold, i scored by finding a seriously old and worn window!!!!
 lots of chippy paint (probably lead) to remove on both sides...
i took my hand sander to the frame of the window, removing all the paint and dirt and junk that had built up over the years on this ancient window.
then it looked like this - 

finally after removing all that grim, i used my sweeper attachment to clean all the dust off.
now we have this!
gave it a quick spray down with the water hose.
notice the glass pane falling out on the bottom... once everything is completely dry add clear caulking or super glue around your frame to hold the glass in.
what made this project complete was krylon looking glass spray paint. this little bottle was not easy to find. i searched at three different stores, and finally (luckily) scored a bottle. it's not your normal spray paint. it comes in a small container and is 12.99! 
it was well worth the money.
spread out your drop cloth outdoors and place your window over that with the back of the frame facing up. you want to spray the back side because this paint gives a mirrored effect on the reverse side. 
start spraying even coats over the glass.
you can re-coat quickly because the paint dries so fast. i believe i gave the glass five different coats.
this is what the window looked like after spraying. cloudy. i was worried for a bit.
but then i flipped her over....
and we had a mirror!
how it all fit perfectly together - 

i love the contrast of the colored dresser and the rustic wood mirror!
the dark walnut stain brought the original wood back to life, and when it pops through like in the picture above, it is nearly the same color as the window frame which has no stain. 
i think the new color makes the glass knobs stand out more, and i love that
and accessorizing this table could not be complete without a few blue mason jars. just adds that extra loveliness.

 i love my new dresser and mirror and feel REALLLLLLLLLY proud of this one!
 

Blog Template by BloggerCandy.com