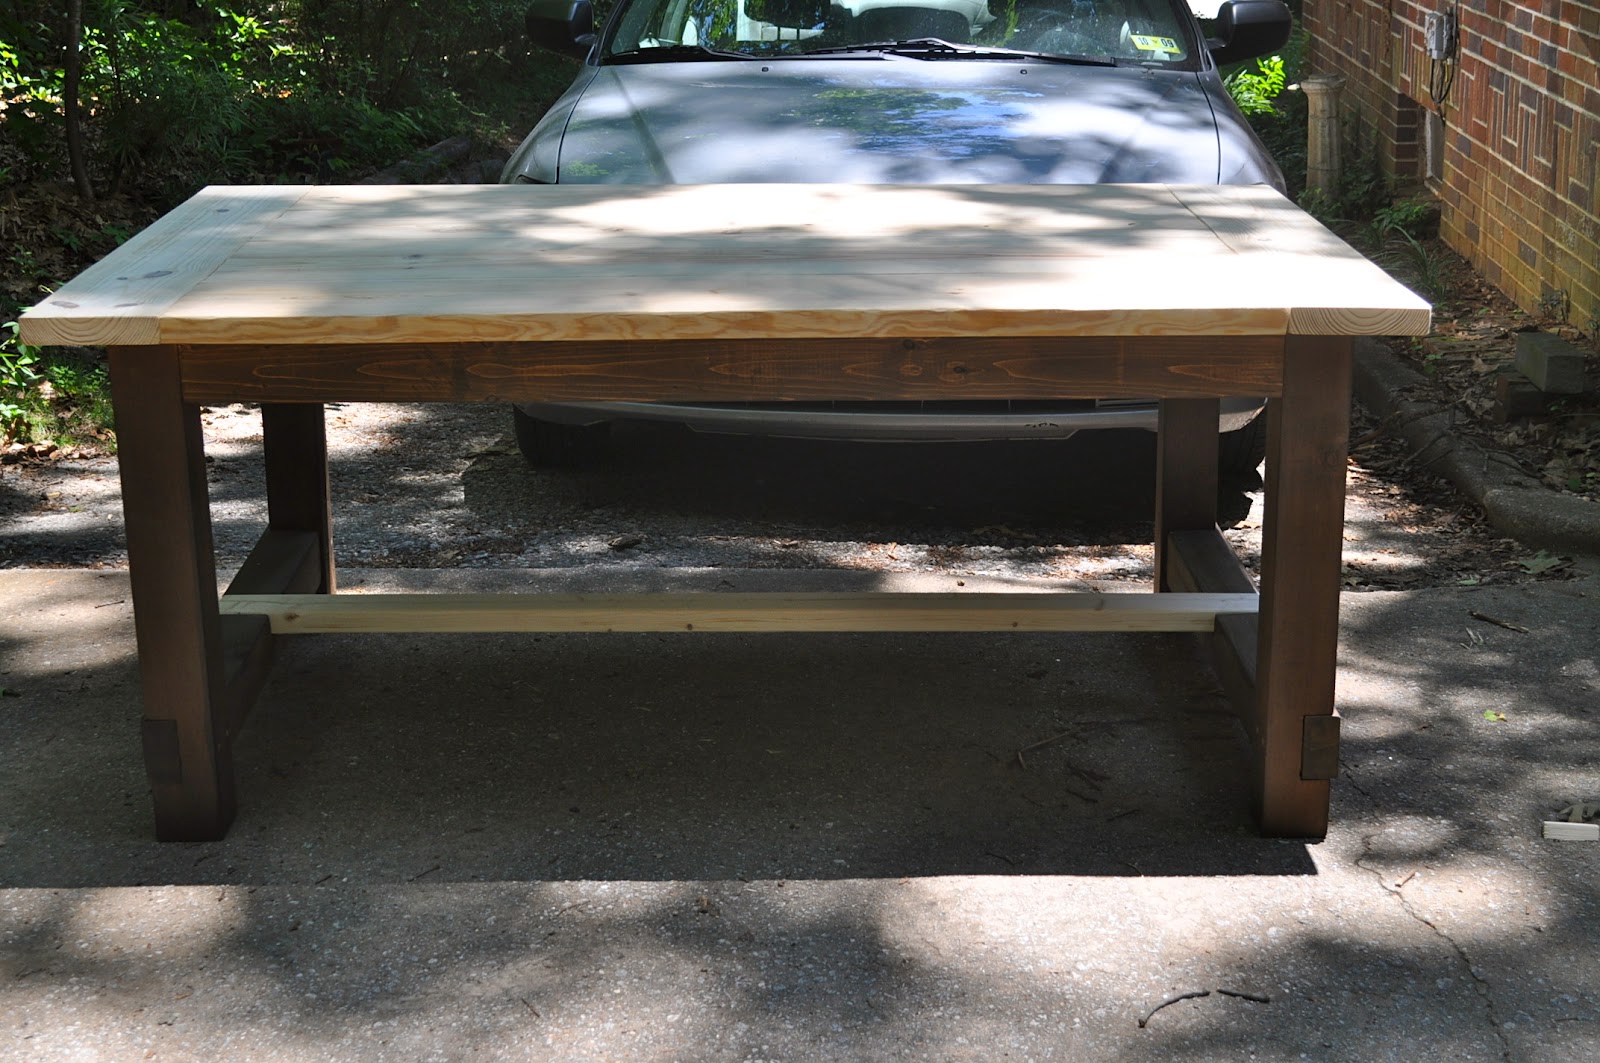
i wanted to post our building process of the bench that went with our farm table, so here it is -
HERE is the plans we used, again changing the measurements to fit our six foot table.
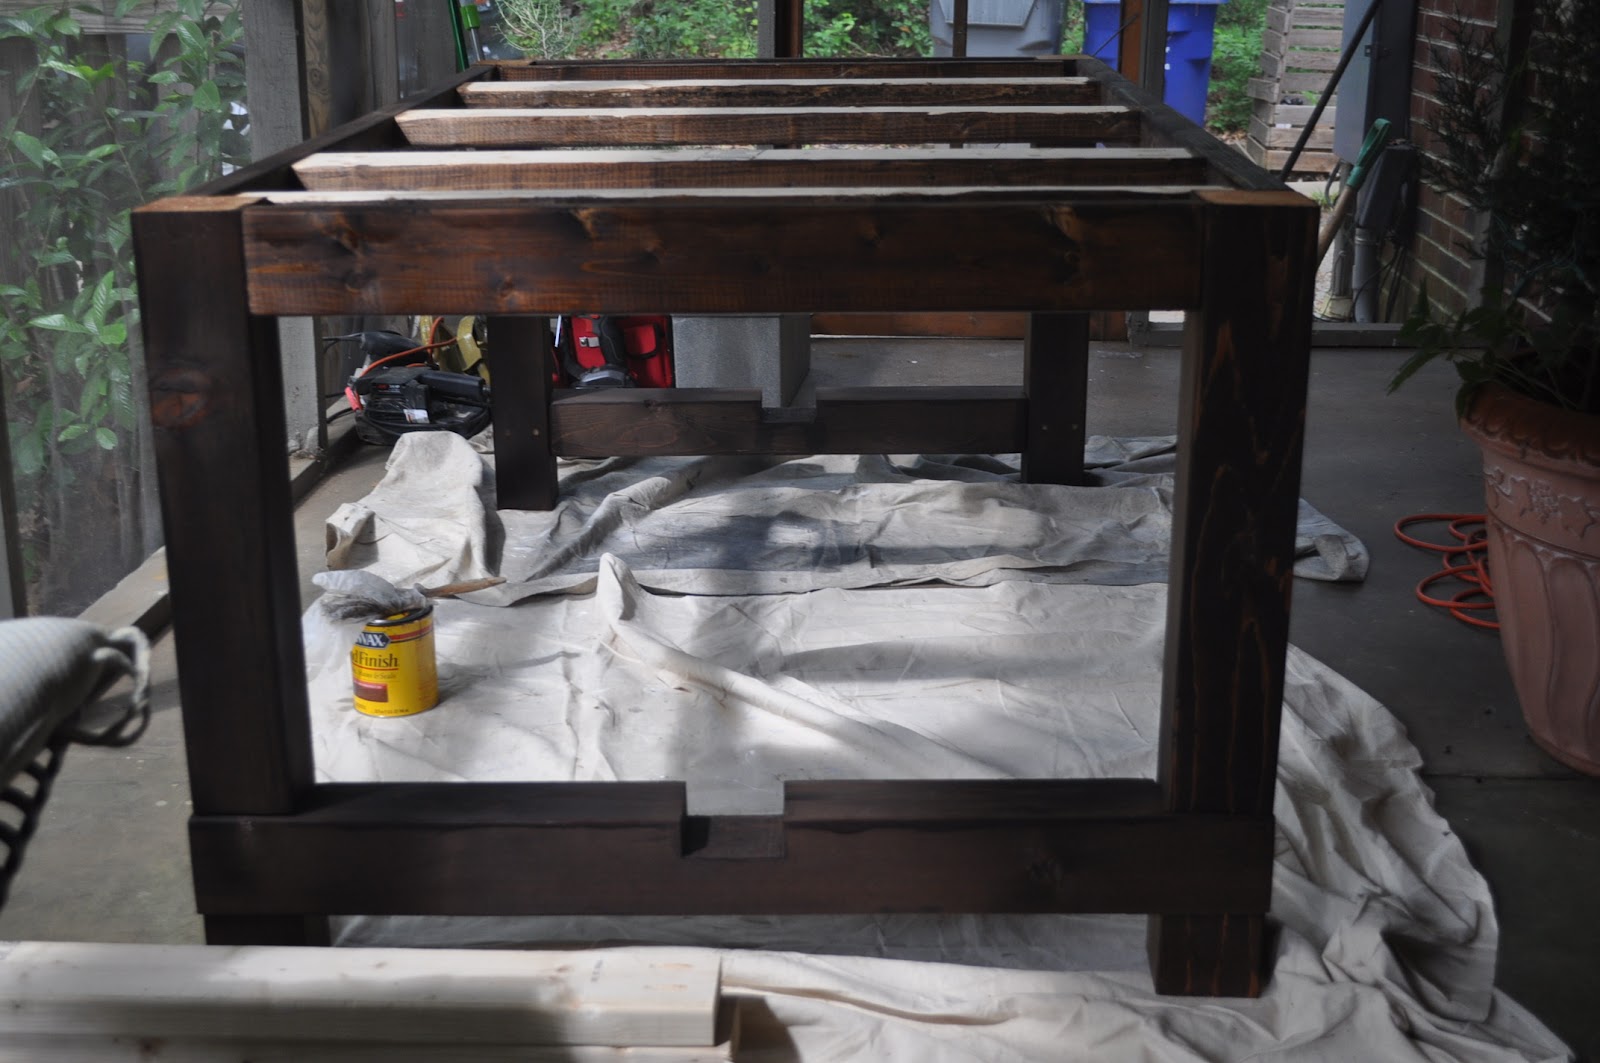
after building the table, the bench was a breeze. we notched the boards out in the beginning and used one as a guide for our stain color. we also cut all the other boards and sanded them all.
then we put the legs together and attached the frame and supports-
we drilled pocket holes on the inner side boards to anchor the bench top - and it was solid as a rock. and i also had a happy hubby - he pretty much did this entire bench in less than 3 hours (with a few breaks!).
easy as pie after building a six foot table the exact same way :)
Showing posts with label DIY. Show all posts
Monday, July 2, 2012
Monday, June 25, 2012
DIY farmhouse table and bench {FINISHED!!!!}
after many hours of work (major work), i can finalllllllly show you all the finished table and bench - and i am beyond excited!
i will start with a list of all the tools and products we used to build everything -
miter saw
circular saw
belt sander
palm sander
dremel (used to sand notches and distress edges of wood)
hand planer
tape measure
square
pencil
chisel
hammer
kreg jig mini pocket hole kit
pocket screws
LOTS of sandpaper (100 and 220 grit)
minwax english chestnut stain
minwax gloss polyurethane
minwax satin poyurethane
and lots of wood
now i will tell you the most surprising part of this entire process - and why all of my reveal photos are taken with the table and bench still on my porch and not in my dining room....
all those hours of work put into building this - all the sweat and bug spray and physical exhaustion...
THIS TABLE IS NOT OURS TO KEEP!
we decided that we would build this as a wedding gift to very dear friends! they have done so very much for us and have been wanting a dining room table - so they are getting just that! we have been sending them photos along the process and they are SO excited to finally have this table in their home!
the bottom stretcher of the table has a very special message on the underside. using our dremel tool, we engraved their name and the year as a 'little something special' for them to always have.
we are currently in the process of building our own table, so when it is finished, i will share that one as well!
and the finished table and bench -
i'm telling ya - this tabletop is so smooth! and after 4 coats of poly, it better have been!
the handmade burlap fringed table runner looks amazing on the new table, and this was also part of the gift! (blog post on that soon!)
so there you have it! the restoration farmhouse table built for less than 200 bucks! we are more than excited to have made this and can't wait to have our own. needless to say, our friends were beyond excited and it looks amazing in their dining room!
i will start with a list of all the tools and products we used to build everything -
miter saw
circular saw
belt sander
palm sander
dremel (used to sand notches and distress edges of wood)
hand planer
tape measure
square
pencil
chisel
hammer
kreg jig mini pocket hole kit
pocket screws
LOTS of sandpaper (100 and 220 grit)
minwax english chestnut stain
minwax gloss polyurethane
minwax satin poyurethane
and lots of wood
now i will tell you the most surprising part of this entire process - and why all of my reveal photos are taken with the table and bench still on my porch and not in my dining room....
all those hours of work put into building this - all the sweat and bug spray and physical exhaustion...
THIS TABLE IS NOT OURS TO KEEP!
we decided that we would build this as a wedding gift to very dear friends! they have done so very much for us and have been wanting a dining room table - so they are getting just that! we have been sending them photos along the process and they are SO excited to finally have this table in their home!
the bottom stretcher of the table has a very special message on the underside. using our dremel tool, we engraved their name and the year as a 'little something special' for them to always have.
we are currently in the process of building our own table, so when it is finished, i will share that one as well!
and the finished table and bench -
i'm telling ya - this tabletop is so smooth! and after 4 coats of poly, it better have been!
the handmade burlap fringed table runner looks amazing on the new table, and this was also part of the gift! (blog post on that soon!)
so there you have it! the restoration farmhouse table built for less than 200 bucks! we are more than excited to have made this and can't wait to have our own. needless to say, our friends were beyond excited and it looks amazing in their dining room!
Labels:
DIY
Saturday, June 16, 2012
DIY farmhouse table - part two
{sorry that part two has taken me so long to post :( right now 95 percent of my time is being spent in west virginia with my family for certain reasons -but i will get the finished product up here as soon as possible. thanks for all the calls, texts and emails... means the world.}
here is where the hard part began... the top and finishing.
yes, cutting the wood to the exact measurements can be nerve racking, but staining the table is the final straw. we chose to use english chestnut by minwax and started with the base of the table.
then we put together the table top. we went with 2x10 and 2x12 planks, using two of each. we used the kreg jig to attach the boards together on the underside of the tabletop.
the table top wasn't perfectly even - and i wanted it to be smooth enough to slide a plate across! david went and bought a hand planer and used that to even out all the top boards. it did exactly the job we needed - and after completely wearing our arms out our table was perfectly smooth! we cut the breadboard ends and attached those to complete the tabletop.
table DONE! atleast the building part...
here is what we did with EVERY SINGLE BOARD to prepare the stain.
when the wood was cut to it's measurement we would sand with 100 grit sandpaper using a belt sander.
then i would sand again with my palm sander using 220 grit sandpaper. this gives a super smooth finish.
then you stain.
then you sand again with 220.
then you stain.
EVERY. SINGLE. BOARD. (and there are a lot of boards!)
we put the tabletop on saw horses to stain -
so the tabletop was sanded and stained and sanded and stained - and then it was finished! (even though we still have a boatload to do...)
and there she is sitting out in the sun to dry. the stain seriously soaked into the wood and ended up being much more on the mahogany side than we expected. we are doing two coats of gloss poly then finishing with two more coats of satin poly, so that will also make the color change a bit.
until next time :)
here is where the hard part began... the top and finishing.
yes, cutting the wood to the exact measurements can be nerve racking, but staining the table is the final straw. we chose to use english chestnut by minwax and started with the base of the table.
then we put together the table top. we went with 2x10 and 2x12 planks, using two of each. we used the kreg jig to attach the boards together on the underside of the tabletop.
the table top wasn't perfectly even - and i wanted it to be smooth enough to slide a plate across! david went and bought a hand planer and used that to even out all the top boards. it did exactly the job we needed - and after completely wearing our arms out our table was perfectly smooth! we cut the breadboard ends and attached those to complete the tabletop.
table DONE! atleast the building part...
here is what we did with EVERY SINGLE BOARD to prepare the stain.
when the wood was cut to it's measurement we would sand with 100 grit sandpaper using a belt sander.
then i would sand again with my palm sander using 220 grit sandpaper. this gives a super smooth finish.
then you stain.
then you sand again with 220.
then you stain.
EVERY. SINGLE. BOARD. (and there are a lot of boards!)
we put the tabletop on saw horses to stain -
and there she is sitting out in the sun to dry. the stain seriously soaked into the wood and ended up being much more on the mahogany side than we expected. we are doing two coats of gloss poly then finishing with two more coats of satin poly, so that will also make the color change a bit.
until next time :)
Labels:
DIY
Friday, April 27, 2012
a very special skirt {tutorial}
if you know how to turn a sewing machine on, thread the bobbin, and sew a straight line - then you can make an elastic waistband skirt in literally minutes. there is really nothing to it! search pinterest for an elastic waist skirt and your options will be endless!
with that said, i have been making these skirts and LOVING them! last winter i found a skirt a jcrew that i REALLLLLLLY wanted, but didn't want to spend the money on. i found a wool fabric that was very similar and made my own! saved myself 60 bucks!
last year when david's grandmother passed, everyone went through her home to take things that were special to them. mrs. betty was a crafter! she had OOODLES of fabric stashes and my precious husband brought those home to me! i was beyond excited to sew something with fabric that she had once used. in one of the stashes was a very pale pink fabric with tiny white roses on it. it had been ripped up and cut on, but there was about a 1/2 yard left in one piece.
here is the fabric -
so pink and girly!
i decided to make the first skirt for ellie because we went to raleigh last weekend, and i could try it on her to make sure it fit properly.
i put together a picture tutorial so you can make your own! i promise, it is so simple. i made this one in 25 minutes tops.
take the waist measurement of whoever the skirt will be for. in this case, the waist measurement was 19. i doubled that measurement and cut a 38 inch wide piece of fabric. a standard 3-4 toddler skirt is 8-9 inches in length, and i added an inch for the hem. so my starting fabric measured 38 x 10. with right sides facing together sew the open ends together creating a tube and press your seams flat with your iron.
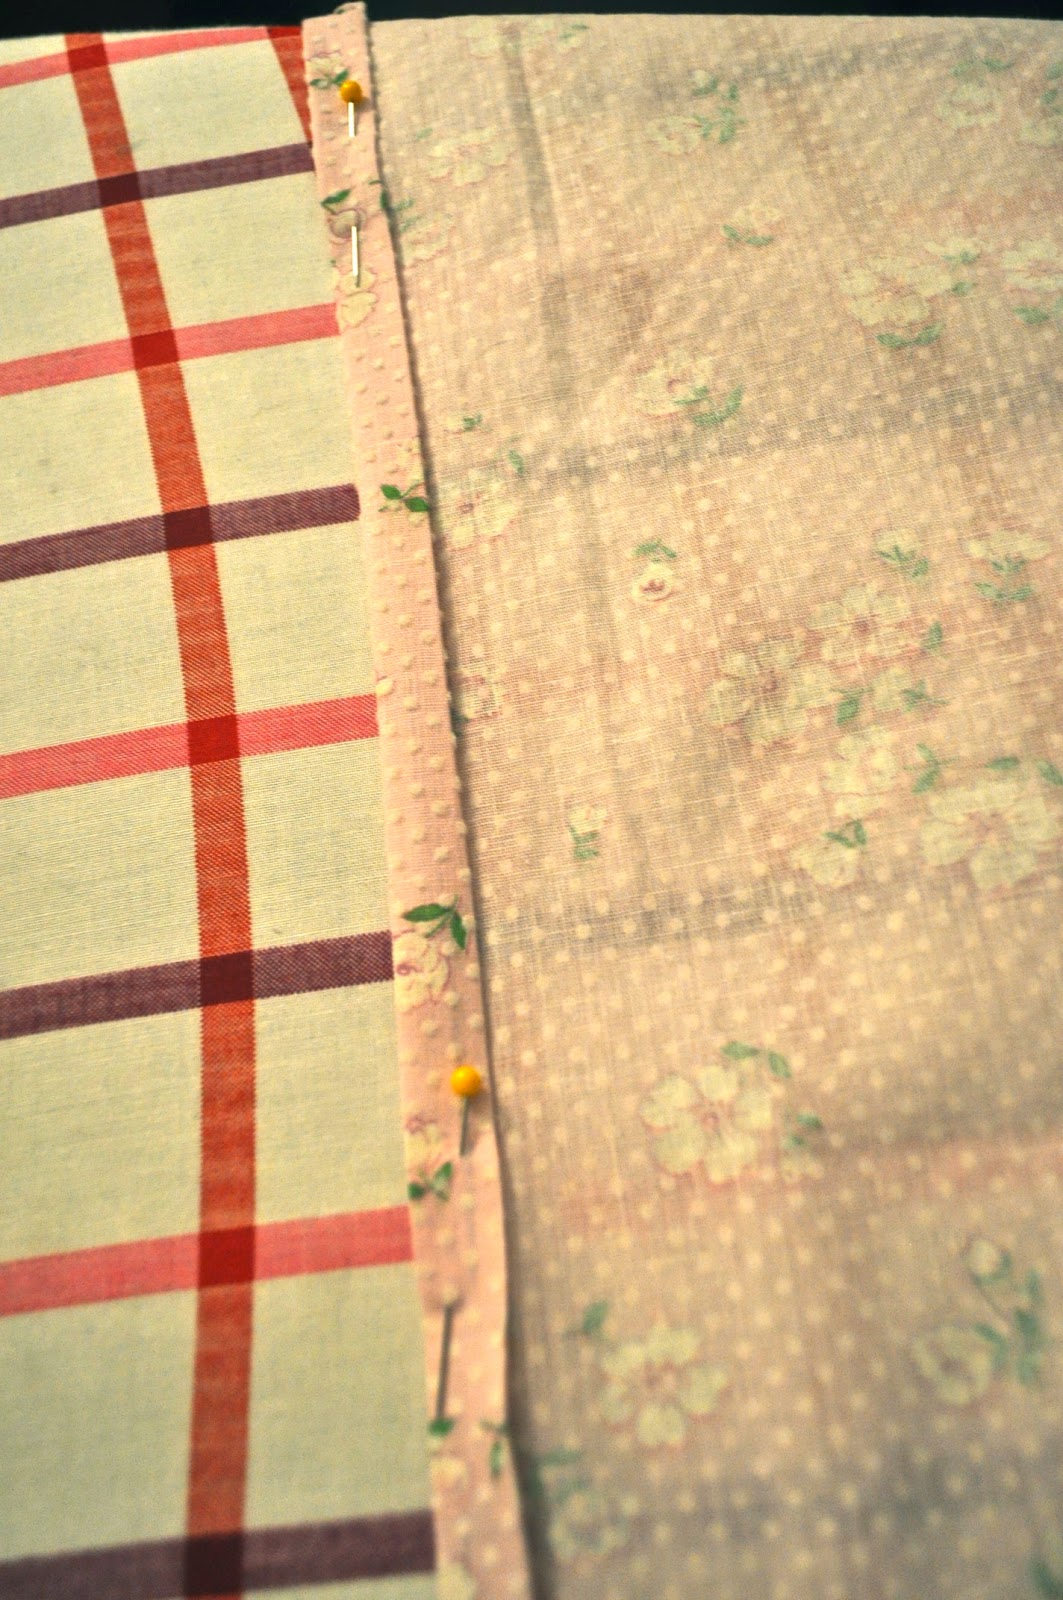
so now you have a tube of fabric. next you will do the hem on the bottom of the skirt. fold down and press 1/4 inch all the way around the bottom of the fabric. then fold over 1/2 inch and press, pin, and sew. the double folds will prevent the skirt's hem from fraying.
all that is left is to add your elastic. take your first waist measurement (mine was 19) and cut your elastic to that width.
on the top of your skirt where the elastic will go, press 1/4 inch again then 1 inch if you are using 3/4 inch elastic (use your elastic as a measurement). if you want a wider elastic like 1 inch, then just make your fold .25 inches larger. pin and sew near the edge of your hem, leaving a 3 inch opening near the seam. this opening is where you will put your elastic through.
this is how your skirt should look -
take your elastic and attach a large safety pin to one end. insert that safety pin through the opening you created in the hem and push it through until it comes out the other side.
sew the two ends of the elastic together with a zig zag stitch. i do this back and forth about 6 times to ensure it will not come apart.
once that is sewn, let the elastic go into the skirt and pull your waistband to separate all the gathers. sew the hem where the opening was, and you are finished!!!!
i was completely happy with this and it has so much meaning! ellie now has a skirt made with her great grandmothers fabric. fabric that she actually used to make something with herself. it's special and it's adorable. i can't wait to make more for all the girls!
i was so excited to put this adorable skirt on ellie and when i did, it was the perfect fit! here are some modeling photos of the beautiful ellie showing off her new skirt!
with that said, i have been making these skirts and LOVING them! last winter i found a skirt a jcrew that i REALLLLLLLY wanted, but didn't want to spend the money on. i found a wool fabric that was very similar and made my own! saved myself 60 bucks!
last year when david's grandmother passed, everyone went through her home to take things that were special to them. mrs. betty was a crafter! she had OOODLES of fabric stashes and my precious husband brought those home to me! i was beyond excited to sew something with fabric that she had once used. in one of the stashes was a very pale pink fabric with tiny white roses on it. it had been ripped up and cut on, but there was about a 1/2 yard left in one piece.
here is the fabric -
i decided to make the first skirt for ellie because we went to raleigh last weekend, and i could try it on her to make sure it fit properly.
i put together a picture tutorial so you can make your own! i promise, it is so simple. i made this one in 25 minutes tops.
take the waist measurement of whoever the skirt will be for. in this case, the waist measurement was 19. i doubled that measurement and cut a 38 inch wide piece of fabric. a standard 3-4 toddler skirt is 8-9 inches in length, and i added an inch for the hem. so my starting fabric measured 38 x 10. with right sides facing together sew the open ends together creating a tube and press your seams flat with your iron.
so now you have a tube of fabric. next you will do the hem on the bottom of the skirt. fold down and press 1/4 inch all the way around the bottom of the fabric. then fold over 1/2 inch and press, pin, and sew. the double folds will prevent the skirt's hem from fraying.
all that is left is to add your elastic. take your first waist measurement (mine was 19) and cut your elastic to that width.
this is how your skirt should look -
take your elastic and attach a large safety pin to one end. insert that safety pin through the opening you created in the hem and push it through until it comes out the other side.
sew the two ends of the elastic together with a zig zag stitch. i do this back and forth about 6 times to ensure it will not come apart.
once that is sewn, let the elastic go into the skirt and pull your waistband to separate all the gathers. sew the hem where the opening was, and you are finished!!!!
i was completely happy with this and it has so much meaning! ellie now has a skirt made with her great grandmothers fabric. fabric that she actually used to make something with herself. it's special and it's adorable. i can't wait to make more for all the girls!
i was so excited to put this adorable skirt on ellie and when i did, it was the perfect fit! here are some modeling photos of the beautiful ellie showing off her new skirt!
Friday, April 13, 2012
like father like son {DIY bow tie}
my boys can sure sport a bow tie.
these photos melt my heart!
i have been making these bow ties for awhile now and they look completely adorable on any sweet pup! HERE is where i found a fantastic tutorial explaining in detail how to sew one up in no time at all. i made a few changes since mine would be used on a dog instead of a child - i used velcro to secure the ends together and it works like a charm and goes right on top of ollie's collar.
another easy and adorable sewing project!
enjoy :-)
these photos melt my heart!
i have been making these bow ties for awhile now and they look completely adorable on any sweet pup! HERE is where i found a fantastic tutorial explaining in detail how to sew one up in no time at all. i made a few changes since mine would be used on a dog instead of a child - i used velcro to secure the ends together and it works like a charm and goes right on top of ollie's collar.
another easy and adorable sewing project!
enjoy :-)
Tuesday, February 28, 2012
DIY wooden trays
while browsing pinterest, i ran across this blog posting about a gal that made her own 'little wooden trays,' and made it look as easy as pie.
i have been in a search for a tray big enough to hold our coffee pot and grinder, and after seeing this, we decided to make our own.
(david actually did all the work here, i just stained them!)
all we used was 1x6 boards for the bottom and 1x2 boards for the sides. we decided the length and width that we needed the bottoms to be and then framed with the 1x2 boards. it was simple and he had them both built in less than 30 minutes.
he used wood glue as well as nails to attach the sides.
here is one of the trays all put together-
i used the steel wool/vinegar method to stain the trays. i still can't get over how this stain works. i had a jar from a previous project that had been sitting in my basement for nearly a month... the longer it sits the more color changes you will see. this time around my color had a bit of a gray tone which was perfect for this since i have a gray kitchen.
and here is the finished product-
looks just like old barn wood!
here is how the trays look in our kitchen. i think they fit perfectly and we are really happy how they turned out.
another simple and inexpensive project.
happy building!
Labels:
DIY
Subscribe to:
Posts (Atom)